Showing posts with label Hat. Show all posts

Wednesday, January 20, 2016

Puff Stitch Hat

This one was for me.  I needed something a bit more colorful

Pattern:
http://www.bhookedcrochet.com/2015/01/06/free-puff-stitch-hat-pattern/

Materials:
Red Heart Unforgettable in dragonfly. 
H hook

Notes:
Adult large size with an extra few rows of puff stitch and single crochet. . . . I have a big head AND lots of hair.

Sunday, January 5, 2014

Zoe the Zebra


A Zoe the Zebra hat has been on my to do list for a few months ever since Sarah at Repeat Crafter Me posted her design for her newborn Zoe.  As I was making the beanie, and realizing just how many ends I would have to weave in (my least favourite part of crocheting), I thought about her recent candy cane hat pattern and wondered if it would work using different stitches.  So I gave it a try and it did!

Who would want to weave in all those ends?
As I've merged the two patterns, I've written my directions in full as it's just too confusing to only post the changes this time.  But please refer to Sarah's posts (linked above) for great pictures and tutorials, especially for starting the candy cane pattern and building the Zebra pieces.  As my 16 month old Zoe often wears her hats unsupervised I didn't want to use buttons or felt so crocheted all the additions.

Materials:
Vanna's Choice yarn in white and pink
Red Super Saver yarn in black
F/5-3.75mm hook and E/4-3.50mm hook (Disclaimer - I crochet loosely so a normal person would use H and G hooks)
2 Stitch Markers
Tapestry Needle

Abbreviations (Using US Terms):
ch - Chain
SC - Single Crochet
DC - Double Crochet
HDC - Half Double Crochet
W - White Yarn
B - Black Yarn
Magic Circle - A great way to start working in the round - I love this tutorial from Ambassador Crochet.

Beanie (Toddler Size):
Round 1: With F hook and white yarn, make a magic ring, ch 1, 2 SC, 2 HDC, DC in ring.  Don't fasten off or pull tight.  Join black yarn and ch 1 onto magic ring next to the white DC, 5 SC with black yarn, pull tight (5 W DC, 5 B SC).
Round 2: With white, 2 DC in next 5 stitches.  With black, 2 SC in next 5 stitches. (10 W DC, 10 B SC)
Round 3: With white, *2 DC in first stitch, DC in next stitch* five times.  With black, *2 SC in first stitch, SC in next stitch* five times. (15 W DC, 15 B SC).  Place a marker in the last stitch of each colour.  It helped me see the beginning of each round.

Round 4: With white, *2 DC in first stitch, DC in next 2 stitches* five times. With black, *2 SC in first stitch, DC in next 2 stitches* five times. (20 W DC, 20 B SC)
Round 5: With white, *2 DC in first stitch, DC in next 4 stitches* four times.  With black, *2 SC in first stitch, DC in next 4 stitches* four times. (24 W DC, 24 B SC)
Round 6: With white, *2 DC in first stitch, DC in next 11 stitches* twice.  With black, *2 SC in first stitch, SC in next 11 stitches* twice.  (26 W DC, 26 B SC)
Round 7: With white, *2 DC in first stitch, DC in next 12 stitches* twice.  With black, *2 SC in first stitch, SC in next 12 stitches* twice.  (28 W DC, 28 B SC)
Round 8: With white, *2 DC in first stitch, DC in next 13 stitches* twice.  With black, *2 SC in first stitch, SC in next 13 stitches* twice.  (30 W DC, 30 B SC)
Rounds 9-16: 30 white DC, 30 black SC.  Use stitch markers to define rounds.
Finish off: With white, HDC, SC, slip stitch.  With black, SC in next 2 stitches, slip stitch.

Here's the two beanies side by side.  Candy Cane on the right and Sarah's Zebra hat pattern on the right. Note the lack of seem with the Candy cane version.


Earflaps (make 2):
Use the joins between black and white to mark the centers of each side of the hat.  Join white 5 stitches before the center point.
Row1: Ch 1, SC in next 10, ch 1, turn (10 SC)
Row 2: SC decrease, SC in next 6 stitches, SC decrease, ch 1, turn (8 SC)
Row 3: SC across, ch 1, turn (8 SC)
Row 4: SC decrease, SC in next 4 stitches, SC decrease, ch 1, turn (6 SC)
Row 5: SC across, ch 1, turn (6 SC)
Row 6: SC decrease, SC in next 2 stitches, SC decreases, ch 1, turn (4 SC)
Row 7: SC across, ch 1, turn (4 SC)
Row 8: 2 SC decreases, ch 1, turn (2 SC)
Row 9: SC decrease, fasten off and weave in ends)

With pink accent colour, join at any point of hat, ch 1 and SC around, join with a slip stitch to first stitch, fasten off, and weave in ends.

Ears (make 2):
Make outer ear in black, using F hook.  Make inner ear in white using E hook so it comes out a bit smaller.
Row 1: Ch 5, SC in 2nd ch from hook and in remaining chs, ch 1, turn (4 SC)
Row 2: 2 SC in first stitch, SC in next 2 stitches, 2 SC in last stitch, ch 1, turn (6 SC)
Row 3-5: SC in each stitch across, ch 1, turn (6 SC)
Row 6: SC decrease, SC in next 2 stitches, SC decrease, ch 1, turn (4 SC)
Row 7: SC in each stitch across, ch 1, turn (4 SC)
Row 8: SC decrease twice, SC around whole ear.  Fasten off, leaving a long tail in black to sew onto hat.

Join the inner and outer ears together by SC around the white piece into the front loop of the black piece with pink yarn. 

Sew ears onto hat by pinching the bottom of the ear and stitching it together with a tapestry needle.  Then attach to hat at the crease through two black SCs in the third and fourth round.  Weave through the same SCs and ear until secure. 

Snout: 
Row 1: With black, ch 7, SC in 2nd ch from hook and in remaining chs, ch 1, turn (6 SC)
Row 2: 2 SC in first stitch, SC in next 2 stitches, 2 SC in last stitch, ch 1, turn (8 SC)
Row 3: 2 SC in first stitch, SC in next 6 stitches, 2 SC in last stitch, ch 1, turn (10 SC)
Row 4: 2 SC in first stitch, SC in next 8 stitches, 2 SC in last stitch, ch 1, turn (12 SC)
Row 5: SC across, ch 1, turn (12 SC)
Row 6: SC decrease, SC in next 8 stitches, SC decrease, ch 1, turn (10 SC)
Row 7: SC decrease, SC in next 6 stitches, SC decrease, ch 1, turn (8 SC)
Row 8: SC decrease, SC in next 4 stitches, SC decrease, finish off, leaving a long tail to attach to hat (6 SC)

Nostrils (Make 2):
With pink, magic circle, ch 1, SC 5, join with slip stitch to first stitch, finish off.

Eyes (Make 2):
With black, magic circle, ch 2, HDC 5, join with slip stitch to first stitch, finish off.

Attach nostrils to snout, and snout and eyes to face. Weave in ends.

Mohawk:
Wrap a strand of pink and a strand of black yarn around four fingers 3 times.  Pull through center stitch of the back of the hat in the bottom row to make a loop then pull yarn through the loop to attache.  Repeat in every white round all the way up the hat.  Cut loops and trim ends.


Saturday, January 4, 2014

Kate's "Devine" Hat

I needed a new hat.  The one I made for myself last year is a little big and has a brim which may occasionally impede my line of sight when I'm driving. . . not a good combo. 

So I made the Devine hat from Rheatheylia.com.  It may have taken three attempts to get it right but it fits well now.  And just in time for our brutal temperatures arriving on Monday (high of -5°F)

My littlest helper ran away with the wrapper from my yarn so I'm not sure which brand or colour I used, but it was worsted weight. To account for my loose technique, I used a g hook for the body of the hat and e hook for the ribbing. I ran out of yarn so the ribbing ending up being as follows:
Round 1: SC around
Round 2: DC around
Round 3: Front Post DC in one stitch, Back Post DC in next stitch, around
Round 4: SC around


Friday, December 27, 2013

Family Santa Hats

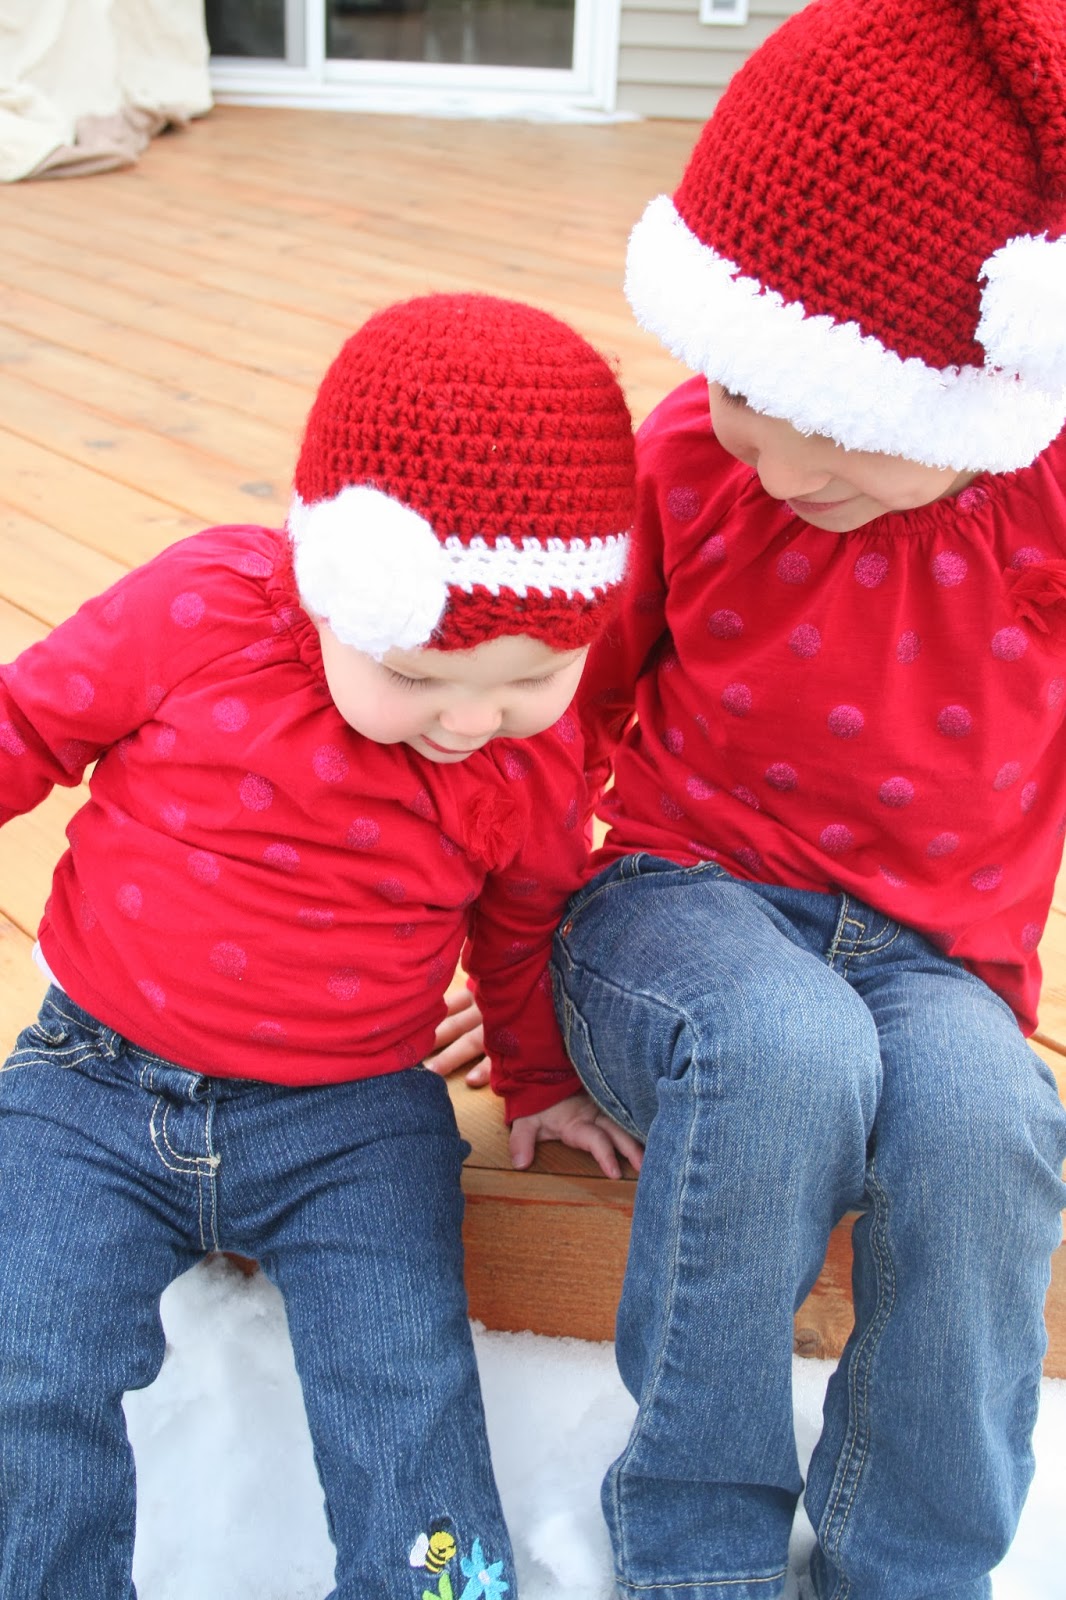
Everyone in the family got a hat! But only just.  Each of our hats was reworked at least twice. . . boy do these ones stretch.  I used TuTu Boutique's pattern from Ravelry.  I sized down to an H hook (I think. . . the last few weeks are a bit of a blur) and the body of the hat ended up with the following number of stitches for each member of the family:
Kate (hat was too big in the end. . . I'll maybe fix it next year) - 70 sts
Kevin - 65 sts
Amelia (5) - 50 sts
Zoe (16 months) - 43 sts


We're following my English roots and not taking the decorations down til the 4th/5th of January so maybe they'll get a little more wear yet.  

Sunday, December 15, 2013

Cloche Hat

I first made this hat for Zoe in the spring.


I've just finished making one for my cousin's daughter, Eva. . . just in time for Mum to take it over to England with her.  It was made to fit a five year old, hence Amelia modeling.

I used this pattern from Crochet Kitten, with a g hook and Bernat Softee Baby yarn in flannel.  The smaller hook and lighter (is that the right word?) yarn help me crochet to a similar size as the pattern.

I sized it up to a child size as follows:
In my magic circle, dc 23 in ring, making 12 shells per round throughout the pattern.  Repeat rounds 4-5 through round 17, so there are 19 rounds in total.

I ran out of ribbon for Eva's hat so just used some shiny yarn and an h hook for the rim and center of the flower.


Monday, December 2, 2013

Santa Hats

As promised, Amelia got a Santa Hat for Thanksgiving.  I wasn't too sure about this one as I was making it, but I love the way it falls when she wears it.  I have a second one on my hook.  It was going to be for me, but since the bells performance I was making it for tomorrow got cancelled, it may be Zoe's instead as she keeps trying to steal her sister's hat.  We'll see if I manage to make one for the whole family by Christmas. . . .there's one or two other things on my to do list.

I used this pattern from TuTu Chic Boutique on Ravelry and Lion Brand Vanna's Choice in cranberry and Bernat Pipsqueak in white.


Tuesday, November 26, 2013

Amelia's Turkey Hat

The five year old has picked up on Mummy's dislike of Christmas starting before Thanksgiving and taken it to a whole new level this year.  The mention of anything Christmas-related is met with hands covering ears and often screeching.  So, she requested a turkey hat and thanks to Kristen Hankins' My Creative Side Blog I was able to oblige.  


In a way, making this hat sums up my crocheting experience.  For some reason, I crochet big (if anyone has any suggestions, I'd love to hear them).  So after three attempts at the beanie I ended up crocheting the 2-4 year old size with a g hook instead of an h. . . and it's still a little big for my average sized 5 year old.


Now I need to get making a Santa hat (why do I tell her what my plans are??) as she has declared that as soon as Thanksgiving is over, she can't possibly wear the turkey any more. :) Oh well, at least it will still fit her next year.

Thursday, November 21, 2013

Festive Striped Beanie with Flower


As a first post, how about my first pattern writing experience?  Zoe (14 months) has been wearing a pumpkin hat all fall and Amelia (5) has declared that it's time Zoe got a new hat. . . so this is what I came up with.  It's a little tight but maybe it will stretch out once she's worn it for a while.  


Materials:
Worsted weight yarn in cranberry and white.

H hook
Tapestry needle

Beanie (12-18 months):
Round 1: Using cranberry yarn magic ring, chain 1, 9 HDC in ring, join, chain 1

Round 2: Work 2 HDC into each st around, join, chain 1 (18 HDC)
Round 3: *2 HDC in first stitch, HDC in next*, repeat around, join, chain 1 (27 HDC)
Round 4: *2 HDC in first stitch, HDC in next 2*, repeat around, join, chain 1 (36 HDC)
Round 5: *2 HDC in first stitch, HDC in next 3*, repeat around, join, chain 1 (45 HDC)
Round 6: *2 HDC in first stitch, HDC in next 14*, repeat around, join, chain 1 (48 HDC)
Rounds 7-12: HDC into each st around, join, chain 1 (48 HDC)
Round 13: Switch to white yarn, join, SC in each stitch around (48 SC)
Rounds 14-16: SC in each st around, join, chain 1 (48 SC)
Round 17: Switch to cranberry yarn, join, HDC in each stitch around, join, chain 3 (48 HDC)
Round 18: 2 DC in same stitch as chain, *skip 2 st, SC in next st, skip 2 st, 5 DC in next st* 7 times, skip 2 st, SC2TOG, 2 DC in same st as chain. Finish off. (8 Fans)

Flower:
I added this flower from The Party Artisan.